Configuration
Administrator Login
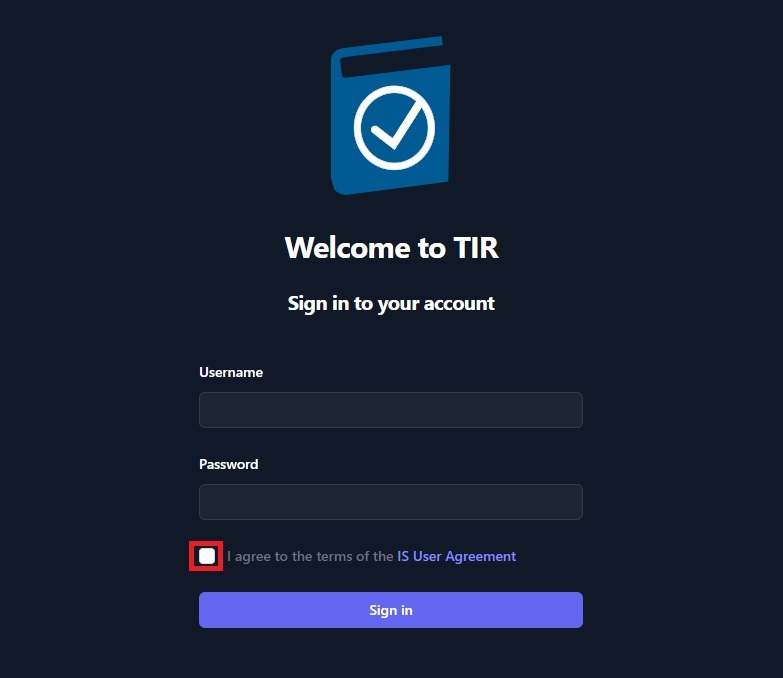
The default Local Administrator Username is admin@tir.local. The initial password will be provided. Enter your admin@tir.local and the initial Password, then review the IS User Agreement and acknowledge that you have read it by clicking the check box. Then, click Sign in.
After successfully logging in for the first time, please change the TIR Admin password by completing the following:
Click the Profile Icon in the upper right corner of the welcome screen.
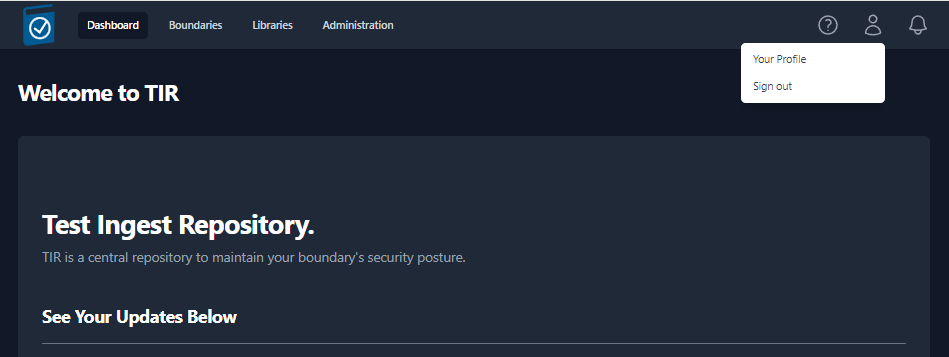
- Click Your Profile to bring up the TIR Admin profile.
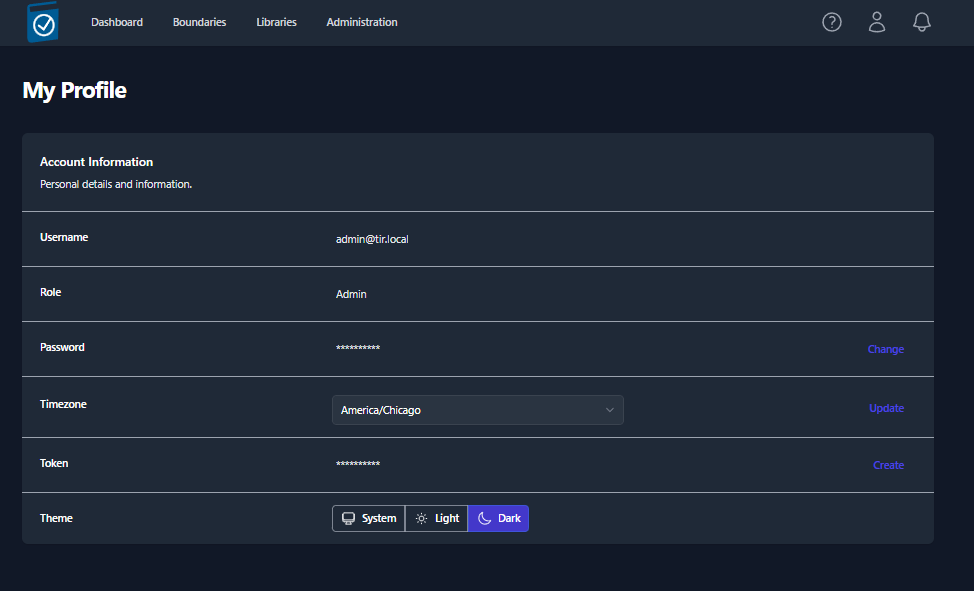
- In the Password row select Change
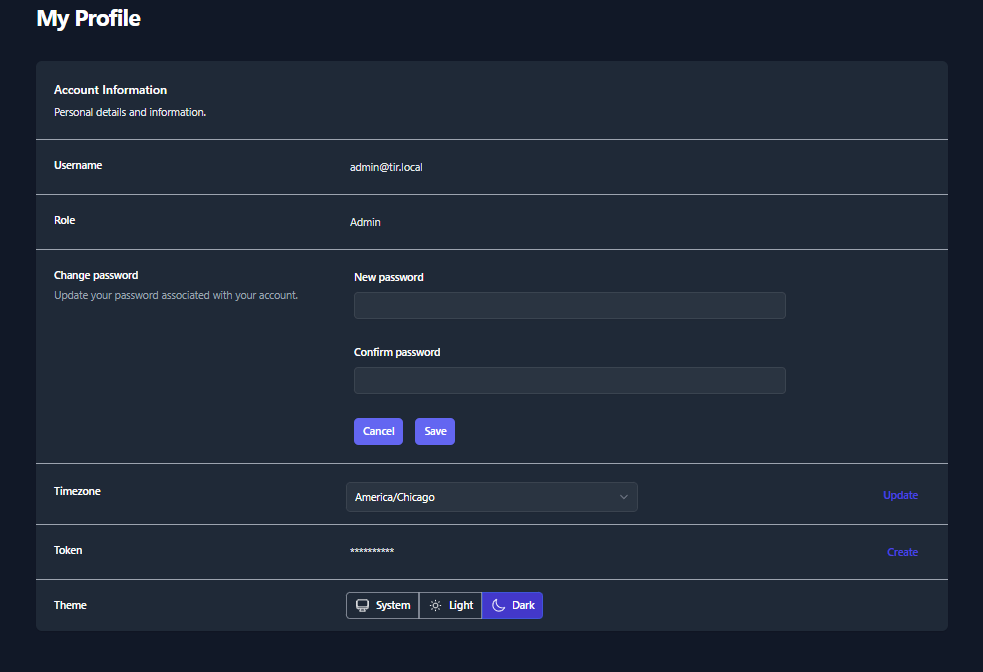
Enter New password
Enter Confirm password
Select Save
Administrative Functions
The TIR Local Administrator account is allowed to perform a number of configuration tasks, like creating local accounts, setting up LDAP, uploading certificates, and configurating centralized Logging. These functions are executed in the Administration Tab.
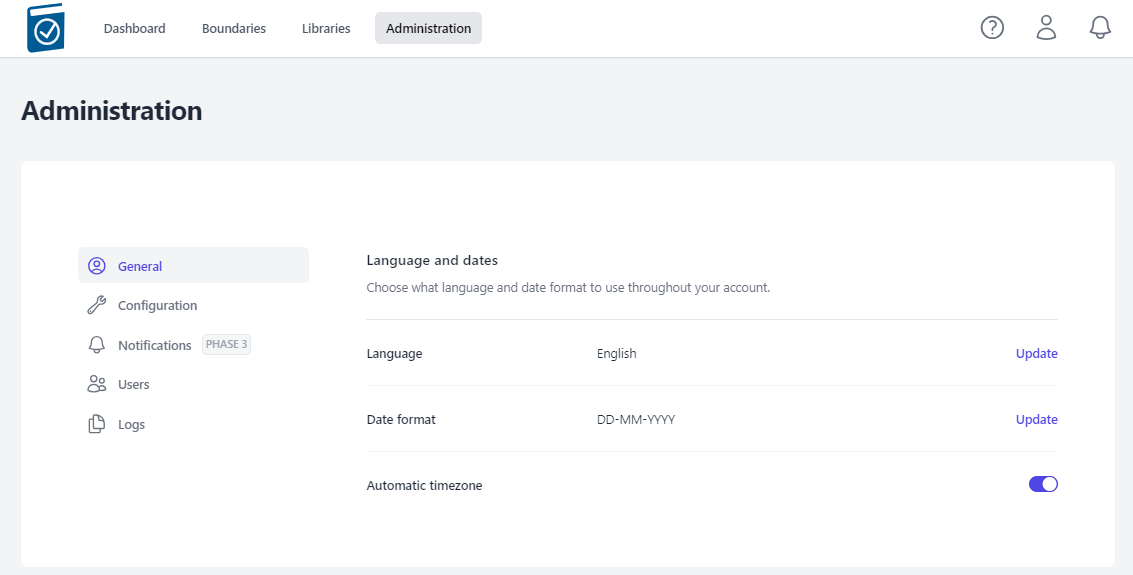
The Administration Tab
The Administration tab is only available through Administrators. You access the Administration tab by selecting Administration at the top center of the web interface.
The four major Administration tab functions are configuration, Notifications, Users, and Logs.
A view of the Administration tab is below:
Configuring LDAP
LDAP is configured during TIR deployment. Please see the TIR Deployment Guide for LDAP configuration procedures.
Configuration
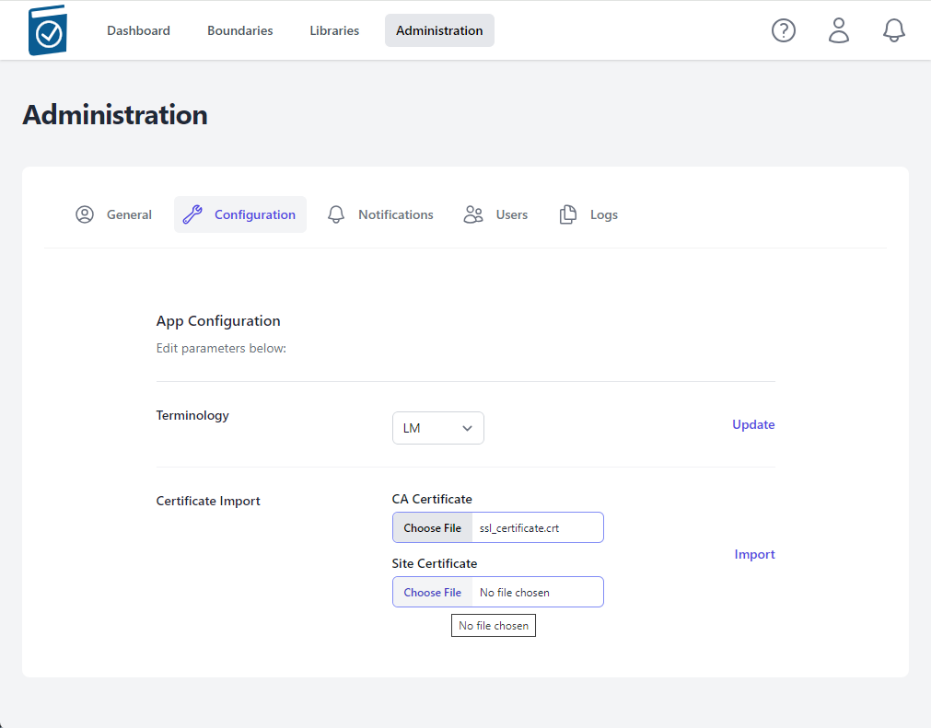
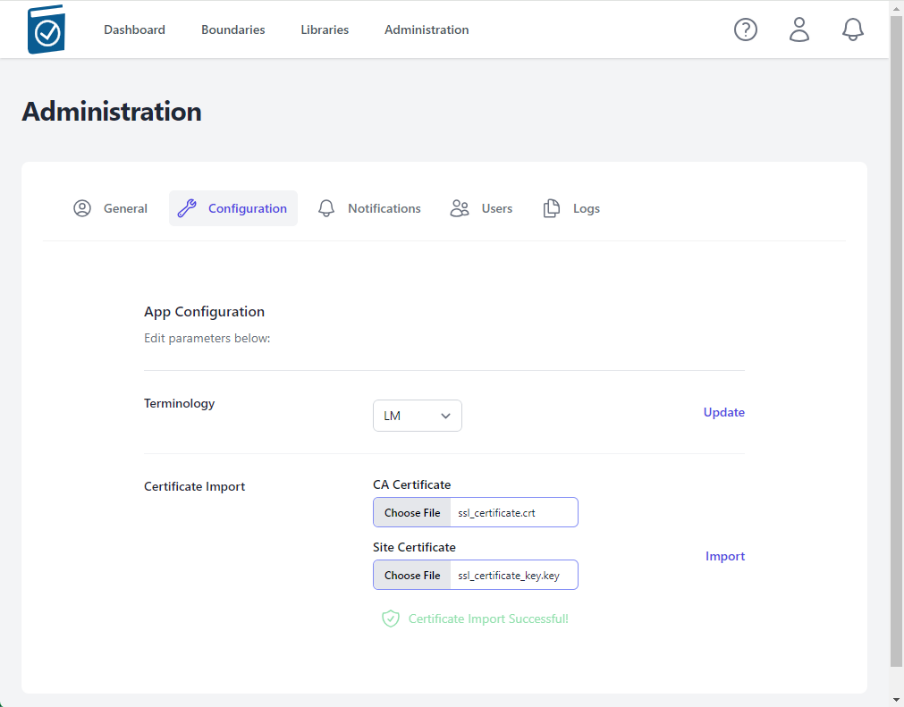
Within the Configuration section an Administrator can change standard Terminology and import a CA Certificate.
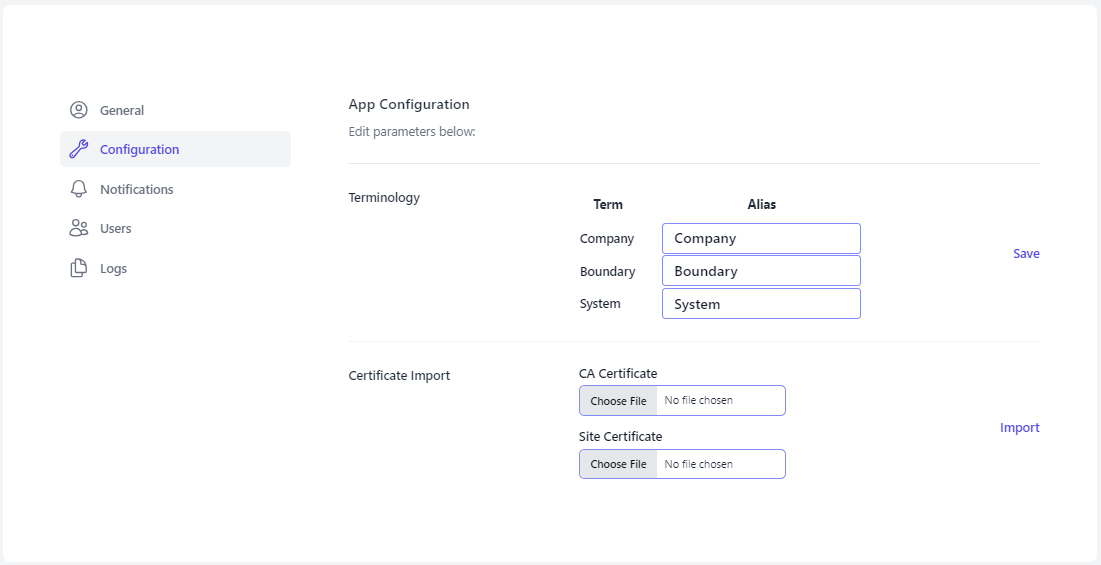
Certificate Import and Verification
- Click on the CA Certificate Choose File box to open a File dialog window and choose your signed x509 formatted .crt file and hit Open - the name of the file will appear in the CA Certificate Text Box
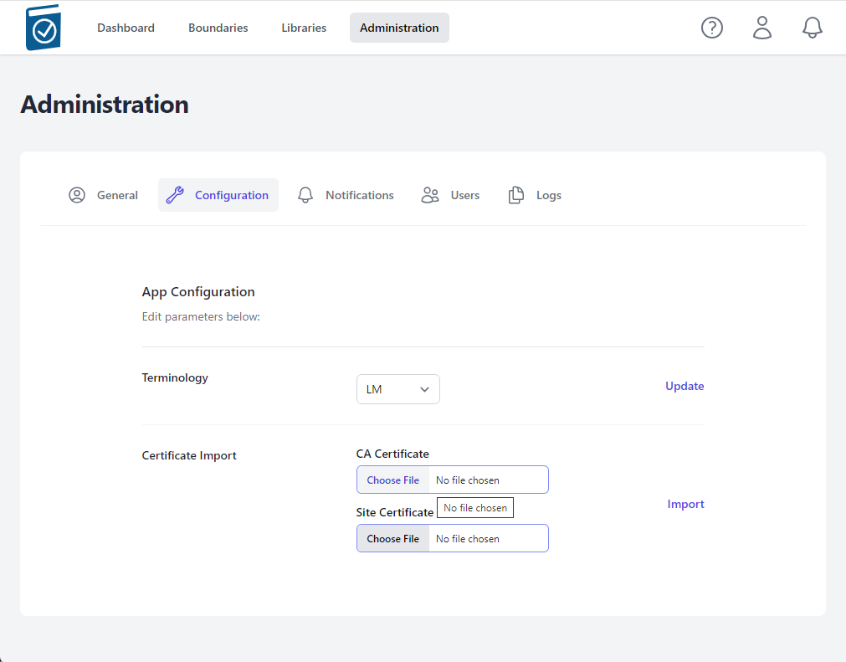
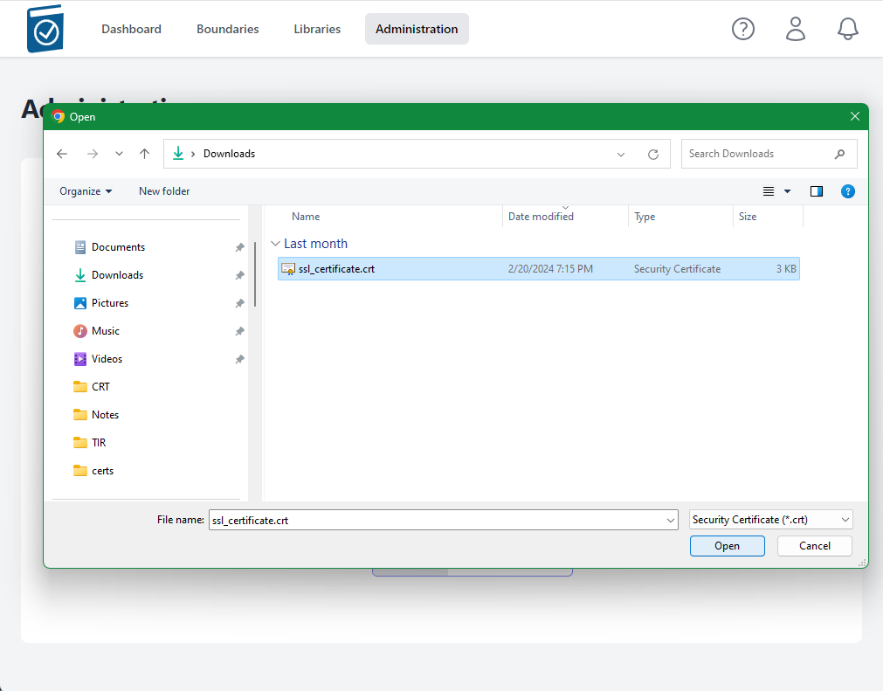
- Note name of .crt file shows up in text field.

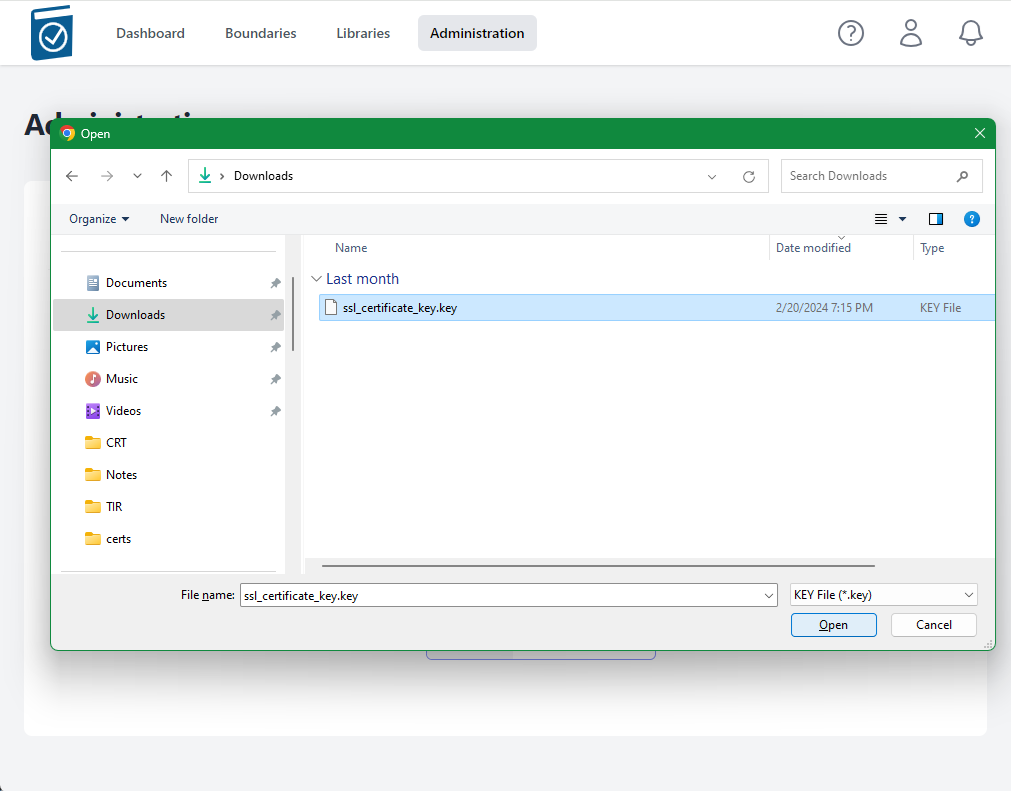
- Click on the Site Certificate Choose File box to open a File dialog window and choose your .pem formatted site key and hit Open - the name of the file will appear in the Site Certificate Text Box
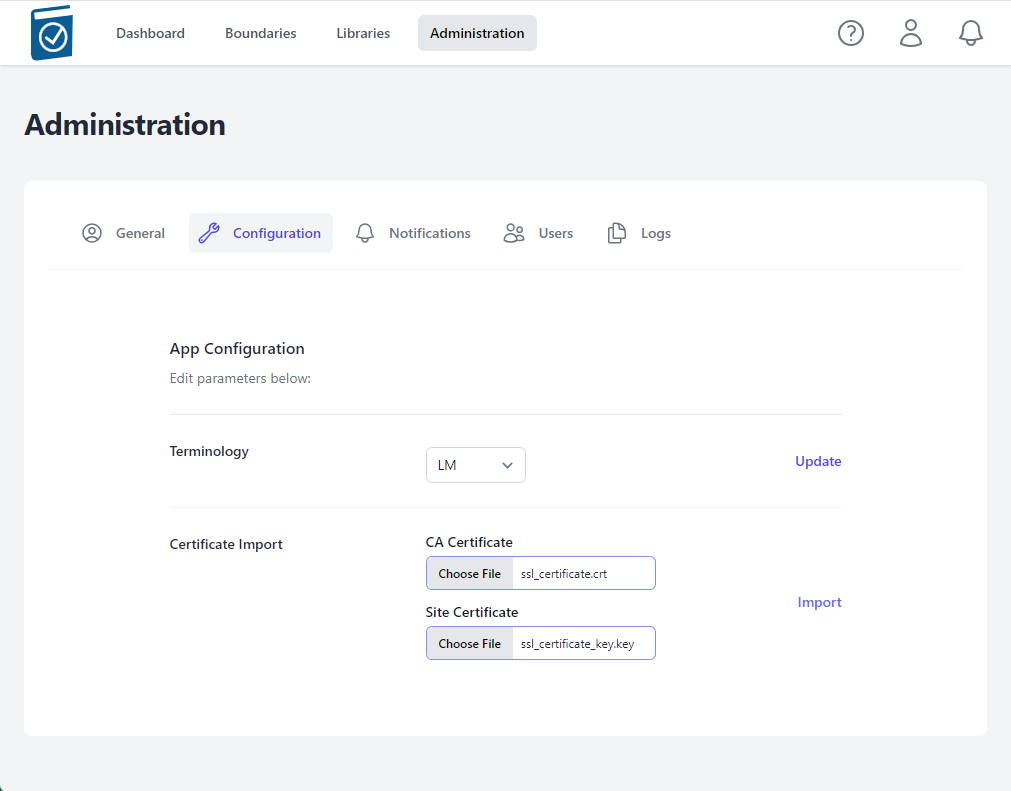
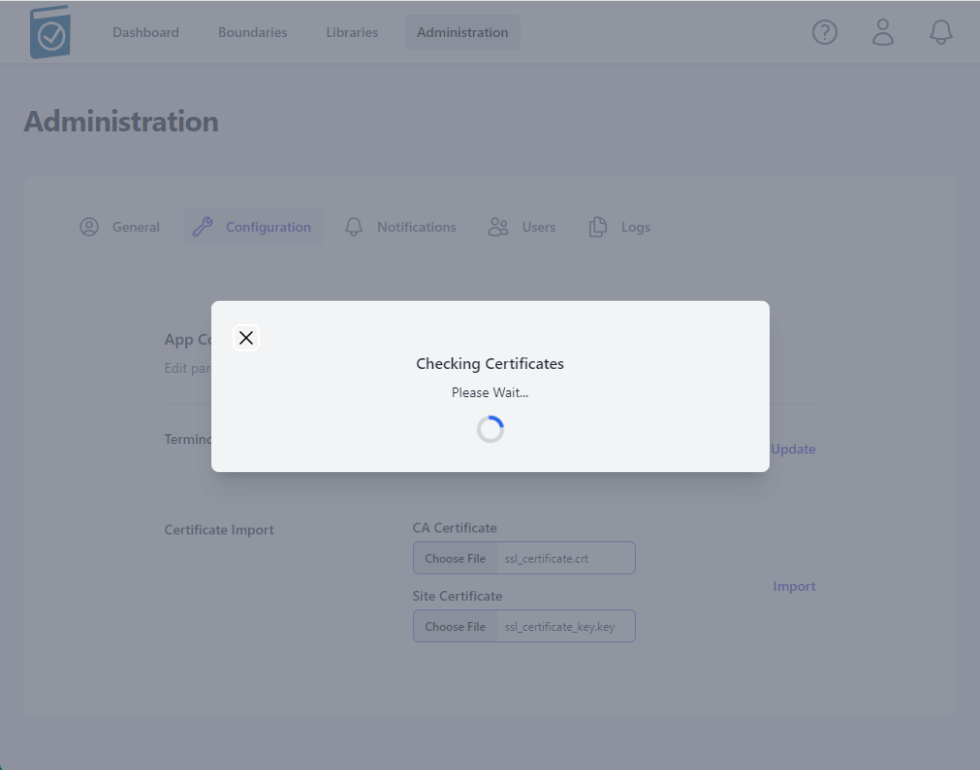
- Select Import
- A modal window saying "Checking Certificates Please Wait... Circle" will appear while the files are being loaded.
- A message underneath the Certificate Import form Text Fields will appear saying "Certificate Import Successful!" if the certs are accepted.
Notes:
The NGINX listener checks imported certificates for:
A .pem formatted key file
A x509 formatted .crt file
Cert files matching modulus
CRT Common Name matching NGINX_HOST variable value
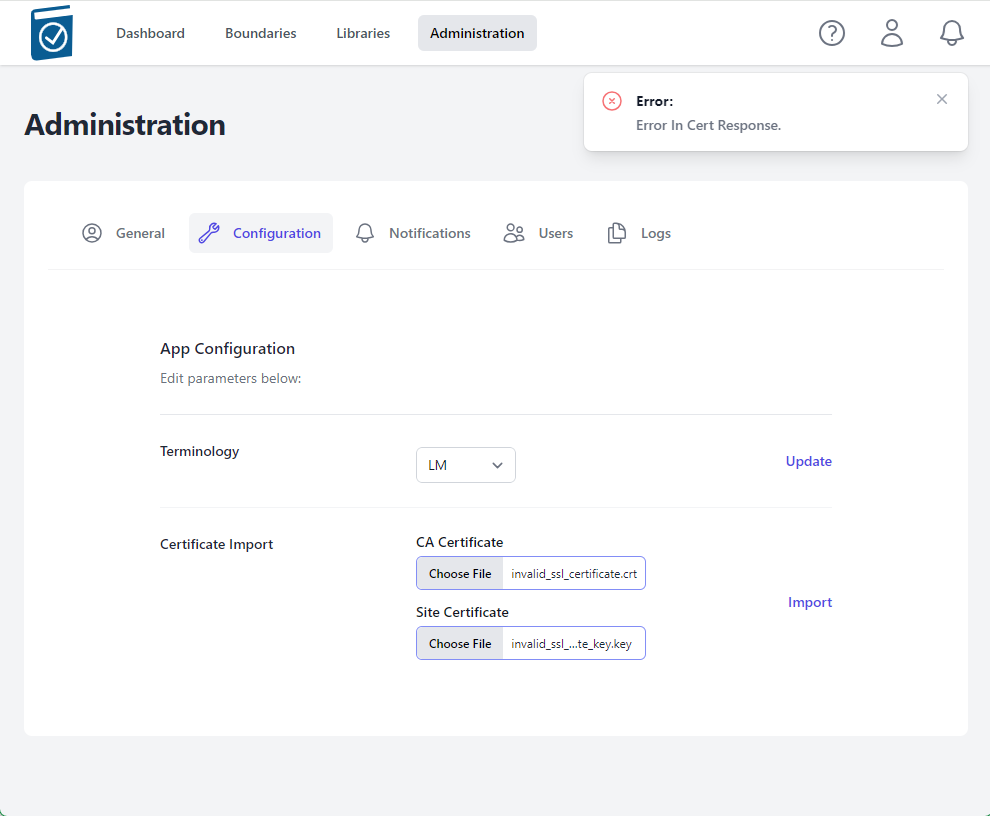
If invalid certificate files are loaded, an error will appear saying Error in Cert Response in the top right of the window
Notifications
Notifications are automatically generated at login for the following:
New STIG Library is available for applicable boundaries
POA&M Completion Dates coming due or overdue
Milestone Dates coming due or overdue
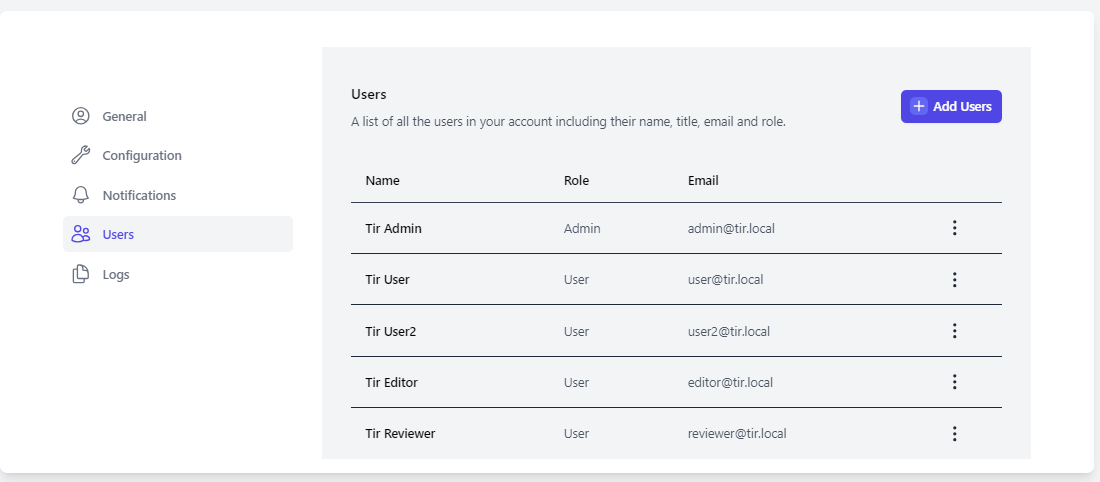
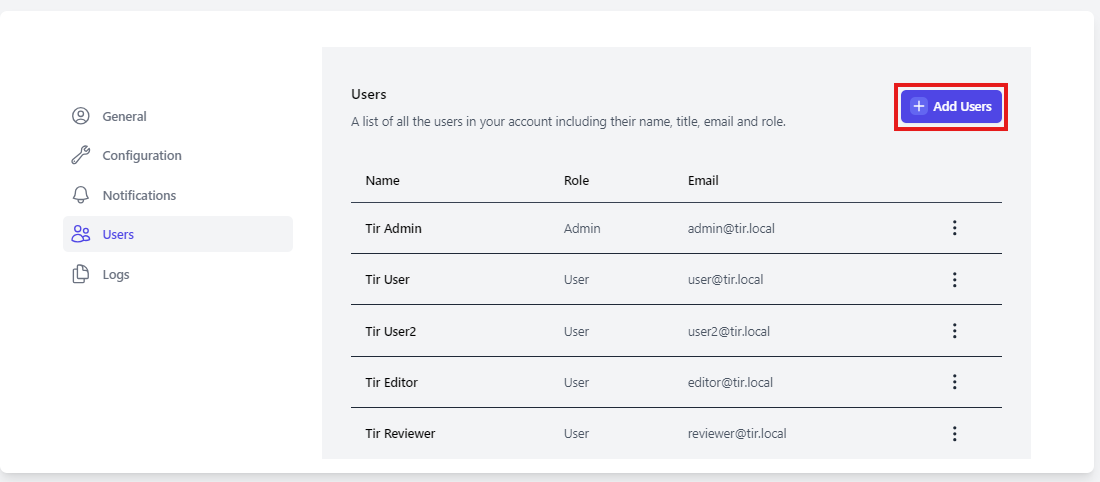
Users
The User functions allow an administrator to add local User or Administrator accounts and change passwords.
Adding a local Account
To add a local account, select Add Users
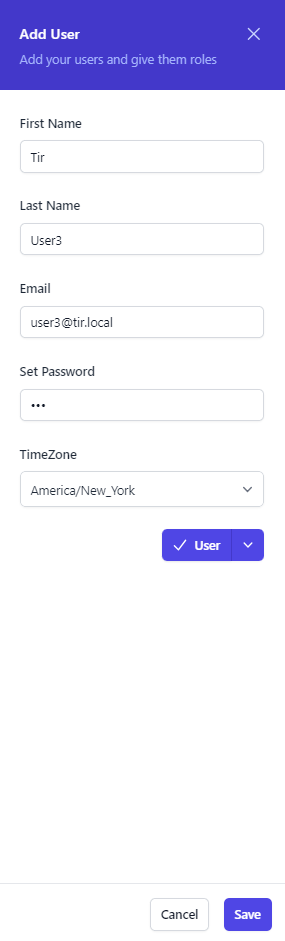
This will bring up the Add User dialog Box. Complete the relevant data, to include First Name, Last Name, Email Address (username), set a unique password, and change the time zone. Select the Role from the drop-down menu. You have the option between Admin or User. Once you have finished, click the Save button to create the user.
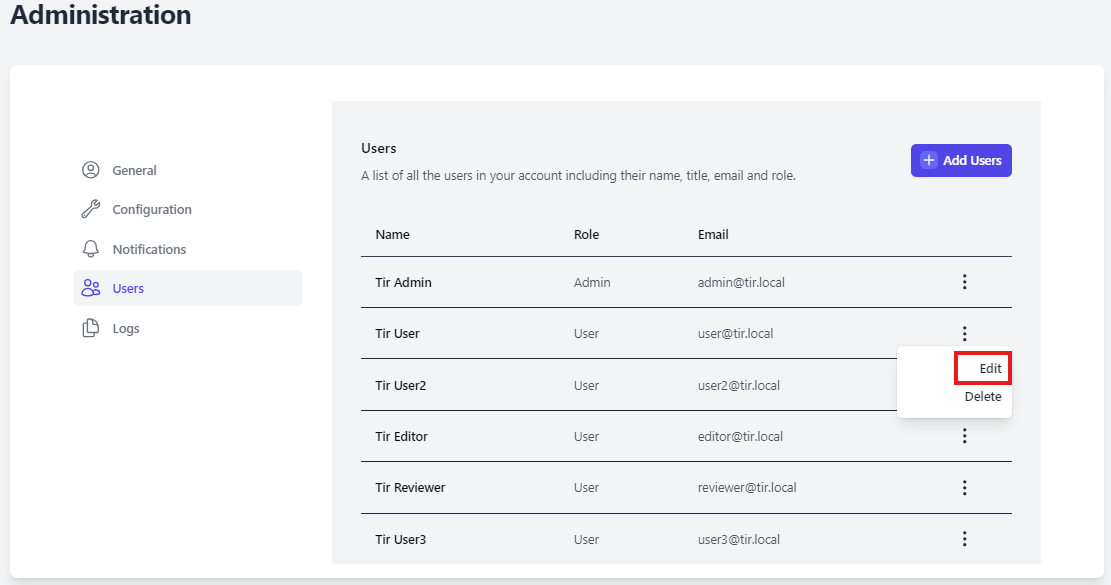
Change User Password
To change a user’s password. Select the 3 buttons to the far right of the user account and select Edit.
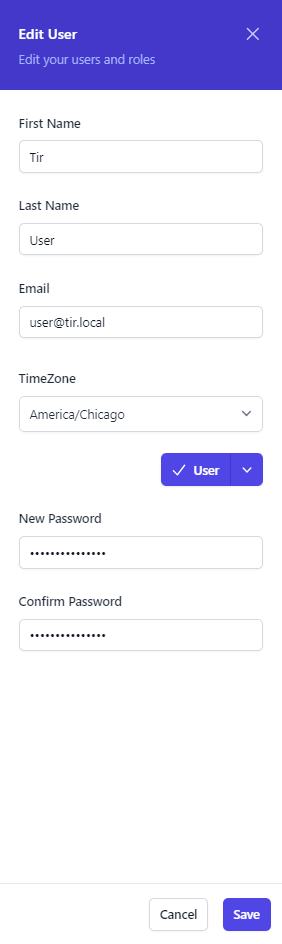
The Edit User dialog box will appear on the right side of the screen. Enter a value for New Password and Confirm Password and click Save.
Logs
Centralized logging can be configured from the Logs function within the Administration tab.
To setup logging, select Logs from the Administration tab menu.
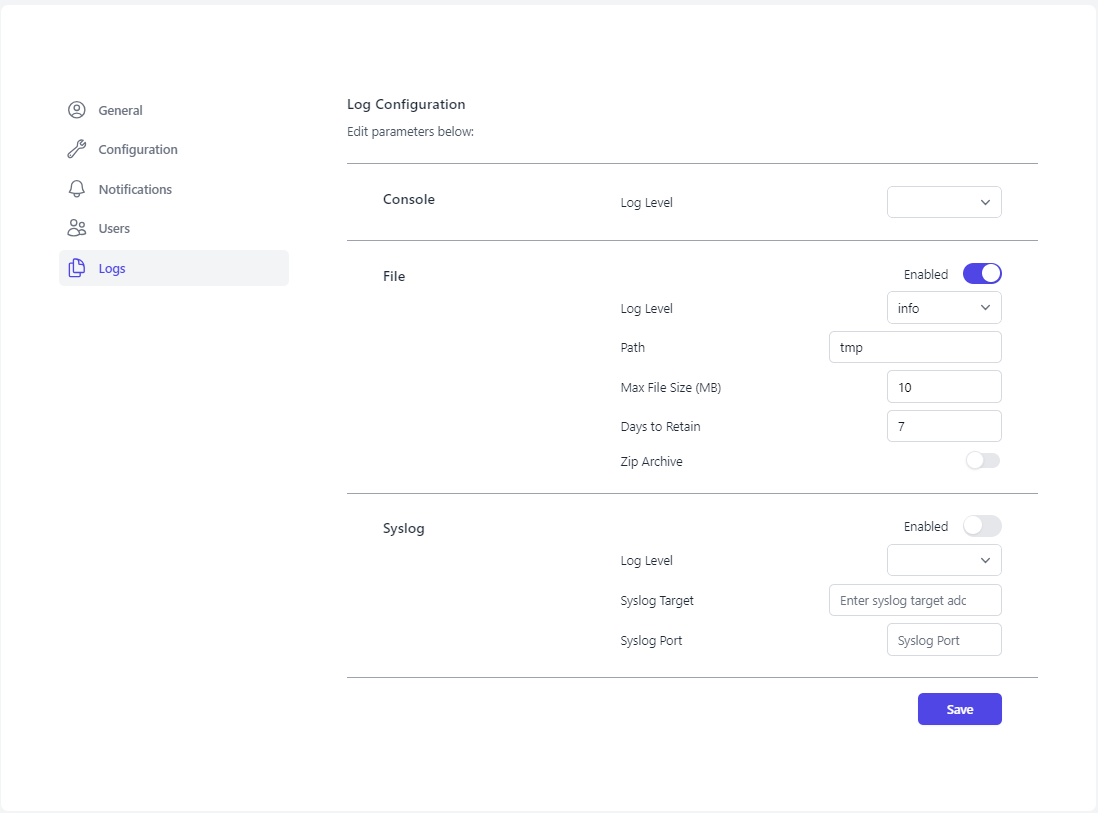
There are three sections on the logging page: Console, File, and Syslog. The Console section will adjust which level of logs get outputed to the console on the host machine. The File section, will control which application logs are being saved off onto the system. The Syslog section will be used to configure the forwarding of your logs to a central location for storage and analysis.
Once properly configured click Save.
Console
Log Level controls which type of logs are sent to the console. There are eight different log levels to choose from (listed below). The higher level logs are inherited into all of the lower level logs. For example; if Debug selected, you will received logs from all eight of the log levels. If Critical (crit) is selected, you will receive logs from Emergency (emerg), Alert, and Critical (crit). The default setting of Warning should meet all required logging for SP 800-53 based authorizations.
- Emergency (emerg)
- Alert
- Critical (crit)
- Error
- Warning
- Notice
- Info
- Debug
File
- Enabled can be toggled on/off to enable and disable logging to files.
- Log Level determines which logs will be saved to files. See Log Level in the Console section (above) for details on the log levels.
- Path is the directory to which the logs will be stored.
- Max File Size (MB) is an adjustable setting to define the max size, in megabytes, of each log file being created.
- Days to Retain is the amount of time you wish to keep the TIR logs before they are allowed to be deleted on the system
- Zip Archive is a toggle option that (when enabled) will zip your log files into an archive.
Syslog
- Syslog Target is the centralized log server, like Splunk.
- Syslog Port is the port being used to forward logs.
- Log Level determines which logs will be forwarded to the centralized log server.
Libraries
The Libraries tab provides the ability to import new STIG libraries and updated Control Correlation Identifiers (CCI) mappings for different NIST SP 800-53 revisions.
STIG Libraries
The Department of Defense (DoD) releases quarterly updates to the STIG benchmarks. These quarterly updates are released as .zip files. Once downloaded, the .zip files can be uploaded to TIR and made available to all users.
View STIG Libraries
Please navigate to the Libraries tab by clicking the Libraries button at the top on the page.
Note: The Libraries tab will display all of the STIG libraries that have been uploaded to your TIR instance.
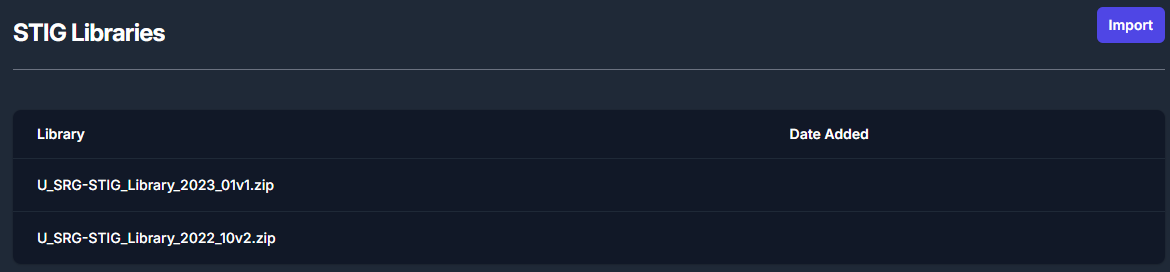
Once imported, the STIG libraries will follow a standardized naming convention. The naming convention will follow this template: U_SRG-STIG_Library_{year}_{month}{revision}.zip.
Please refer to the table below for more examples.
| Year | Release Quarter/ Month | Revision | Naming Convention |
|---|---|---|---|
| 2022 | Q1 / January (01) | v1 | U_SRG-STIG_Library_2022_01v1.zip |
| 2022 | Q2 / April (04) | v2 | U_SRG-STIG_Library_2022_04v2.zip |
| 2023 | Q3 / July (07) | v1 | U_SRG-STIG_Library_2023_07v1.zip |
| 2023 | Q4 / October (10) | v2 | U_SRG-STIG_Library_2023_10v2.zip |
Table 2: STIG Library Naming Conventions
Import STIG Libraries
To import a new STIG library, please navigate to the Libraries page and click the Import button inside the STIG Libraries section, as seen in Figure 14. For reference, this button can be found in the top right of Figure 14: STIG Libraries.
The Import button will open a file navigation window. Please navigate to the .zip file containing the STIG Library and click Open.
CCI Matrix
CCI mappings are provided by NIST and updated as necessary. CCI mappings different between SP 800-53 Rev 4 and Rev 5. Keeping this updated ensure more granular mapping of STIGs to applicable CCIs.
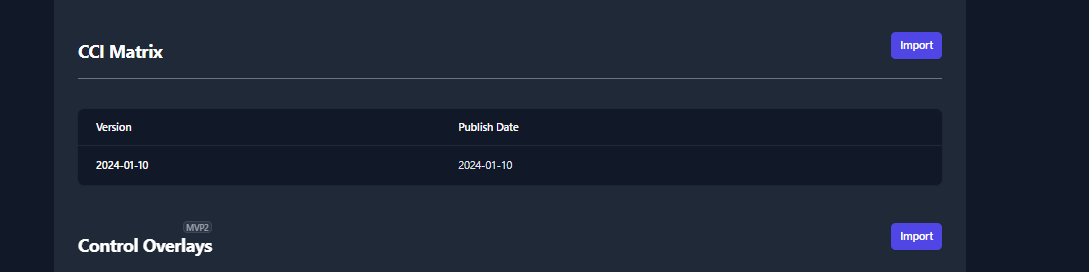
Import CCI Matrix Updates
To import a new CCI Matrix, please navigate to the Libraries page and click the Import button inside the CCI Matrix section. For reference, this button can be found in the top right of Figure 32: CCI Matrix.