6. How to Run InSpec
6. How to Run InSpec
In this section, we will talk about how to run InSpec. In Section 8, you will put this into practice!
6.1 Requirements
To run InSpec, you must have:
- InSpec - you must have InSpec downloaded on whatever machine is running the scans. This does not have to be the same machine that is being tested! (We will run InSpec from the GitHub codespaces lab environment. Inspec is already downloaded in the GitHub codespaces lab environment after running the
./lab-setup.shscript) Check out the Installation Tab for more information on installing InSpec in a different environment. - A Target - you have to have something to test! In the GitHub codespaces in the lab environment, we have two Docker containers running to test.
- An InSpec Profile - you have to have the tests themselves! This is the code itself that will be run with all of the controls, or tests, against the target. You may have this code stored locally on your runner machine, or you may get it from GitHub if your system has access to the internet. We will look at both of those examples.
6.2 The InSpec Command Formula
You run InSpec from the command line. There are many different options for this command, but let's break down the simple formula based on the requirements above.
inspec exec WHERE_IS_THE_PROFILE -t WHAT_IS_THE_TARGET --more-flags EXTRA_STUFF --reporter WHAT_SHOULD_INSPEC_DO_WITH_THE_RESULTS
Start with inspec exec
You need to start with inspec exec so that your terminal knows what it is trying to do in the first place.
WHERE_IS_THE_PROFILE
Then, you can give the location of the InSpec profile, in other words, the code for the tests themselves. If the InSpec profile is stored locally, you can write a path to that file location, such as /root/path/to/InSpecProfiles/nginx-profile. If you are hoping to directly access the profile from GitHub, you can enter the url of the GitHub profile, such as https://github.com/mitre/nginx-stigready-baseline.
WHAT_IS_THE_TARGET
Next, you need to tell your computer what the target is. You add this information after the -t flag. You could test against your local machine (which is less common), you could test a Virtual Machine, you could test a Docker container, or more. You could connect to that machine via SSH, WinRM, or more. We will talk more about these options later.
EXTRA_STUFF
There are MANY more options that you can specify when running the InSpec command. The next most common one is specifying inputs for your profile, for example --input-file /path/to/inputs.yml where you can add inputs that tailor the profile to your environmnent's needs. You can find more information on inputs in the Tailoring Inputs section.
WHAT_SHOULD_INSPEC_DO_WITH_THE_RESULTS
And of course you probably want to see the results. You can specify where those results are displayed or saved based on what you enter after the --reporter flag at the end of your command. For example, the following would print the results on the command line and save it to a file (by creating or overwriting) the file at /path/to/results.json: --reporter cli json:/path/to/results.json. If you do not add this information, the command will default to providing results on the command line, but it will not save those into a file unless you specify the --reporter flag like the example.
Each profile's README should give an example of running the InSpec command for that profile, however, you can always reference the complete documentation on the InSpec command options here.
Want to give it a try?
We will go more in depth on this example in the next two sections, but if you want a head start, you can give running InSpec a try by running this command in your Codespace terminal.
inspec exec https://github.com/mitre/nginx-stigready-baseline -t docker://nginx --reporter cli
In the above example, we are testing an NGINX server. We get the InSpec profile (all of the tests) from GitHub by stating https://github.com/mitre/nginx-stigready-baseline. We use the NGINX target that is running via docker in our Codespace environment by stating docker://nginx, we do not put any extra flags in this example, and lastly, we only report the results to the terminal (in other words, cli output). Later we will refine this command and talk through it in more detail.
Note: The first time you run InSpec, it will likely ask you to accept Chef's license like this:
+---------------------------------------------+
            Chef License Acceptance

Before you can continue, 1 product license
must be accepted. View the license at
https://www.chef.io/end-user-license-agreement/

License that need accepting:
  * Chef InSpec

Do you accept the 1 product license (yes/no)?

>
You can type yes and press enter. This will only happen one time.
If you are using InSpec in a pipeline, you can silently accept the license. Reference Chef's documentation for more information.
Transports - Advanced Examples
The -t flag (or --target flag in long form) specifies what target you want InSpec to scan. How you connect to that target is via a transport. Transports use standard ports and protocols. Some examples are SSH, WinRM, AWS SSM, Docker, and Kubernetes.
Containers (docker transport)
inspec exec https://github.com/mitre/nginx-stigready-baseline
  -t docker://instance_id
  --input-file <path_to_your_input_file/name_of_your_input_file.yml>
  --reporter json:<path_to_your_output_file/name_of_your_output_file.json>
SSH Transport
inspec exec https://github.com/mitre/nginx-stigready-baseline
  -t ssh://Username:Password@IP
  --input-file <path_to_your_input_file/name_of_your_input_file.yml>
  --reporter json:<path_to_your_output_file/name_of_your_output_file.json>
Defaults
Note that if you do not provide one of the required flags in the InSpec exec command, there is default behavior.
| Missing Flag | Default Behavior |
|---|---|
| No target (-t or --target) | Uses your local machine (where InSpec is running) as the target. |
| No --reporter flag | Prints results to the terminal on the InSpec runner machine |
6.3 How to Deploy InSpec
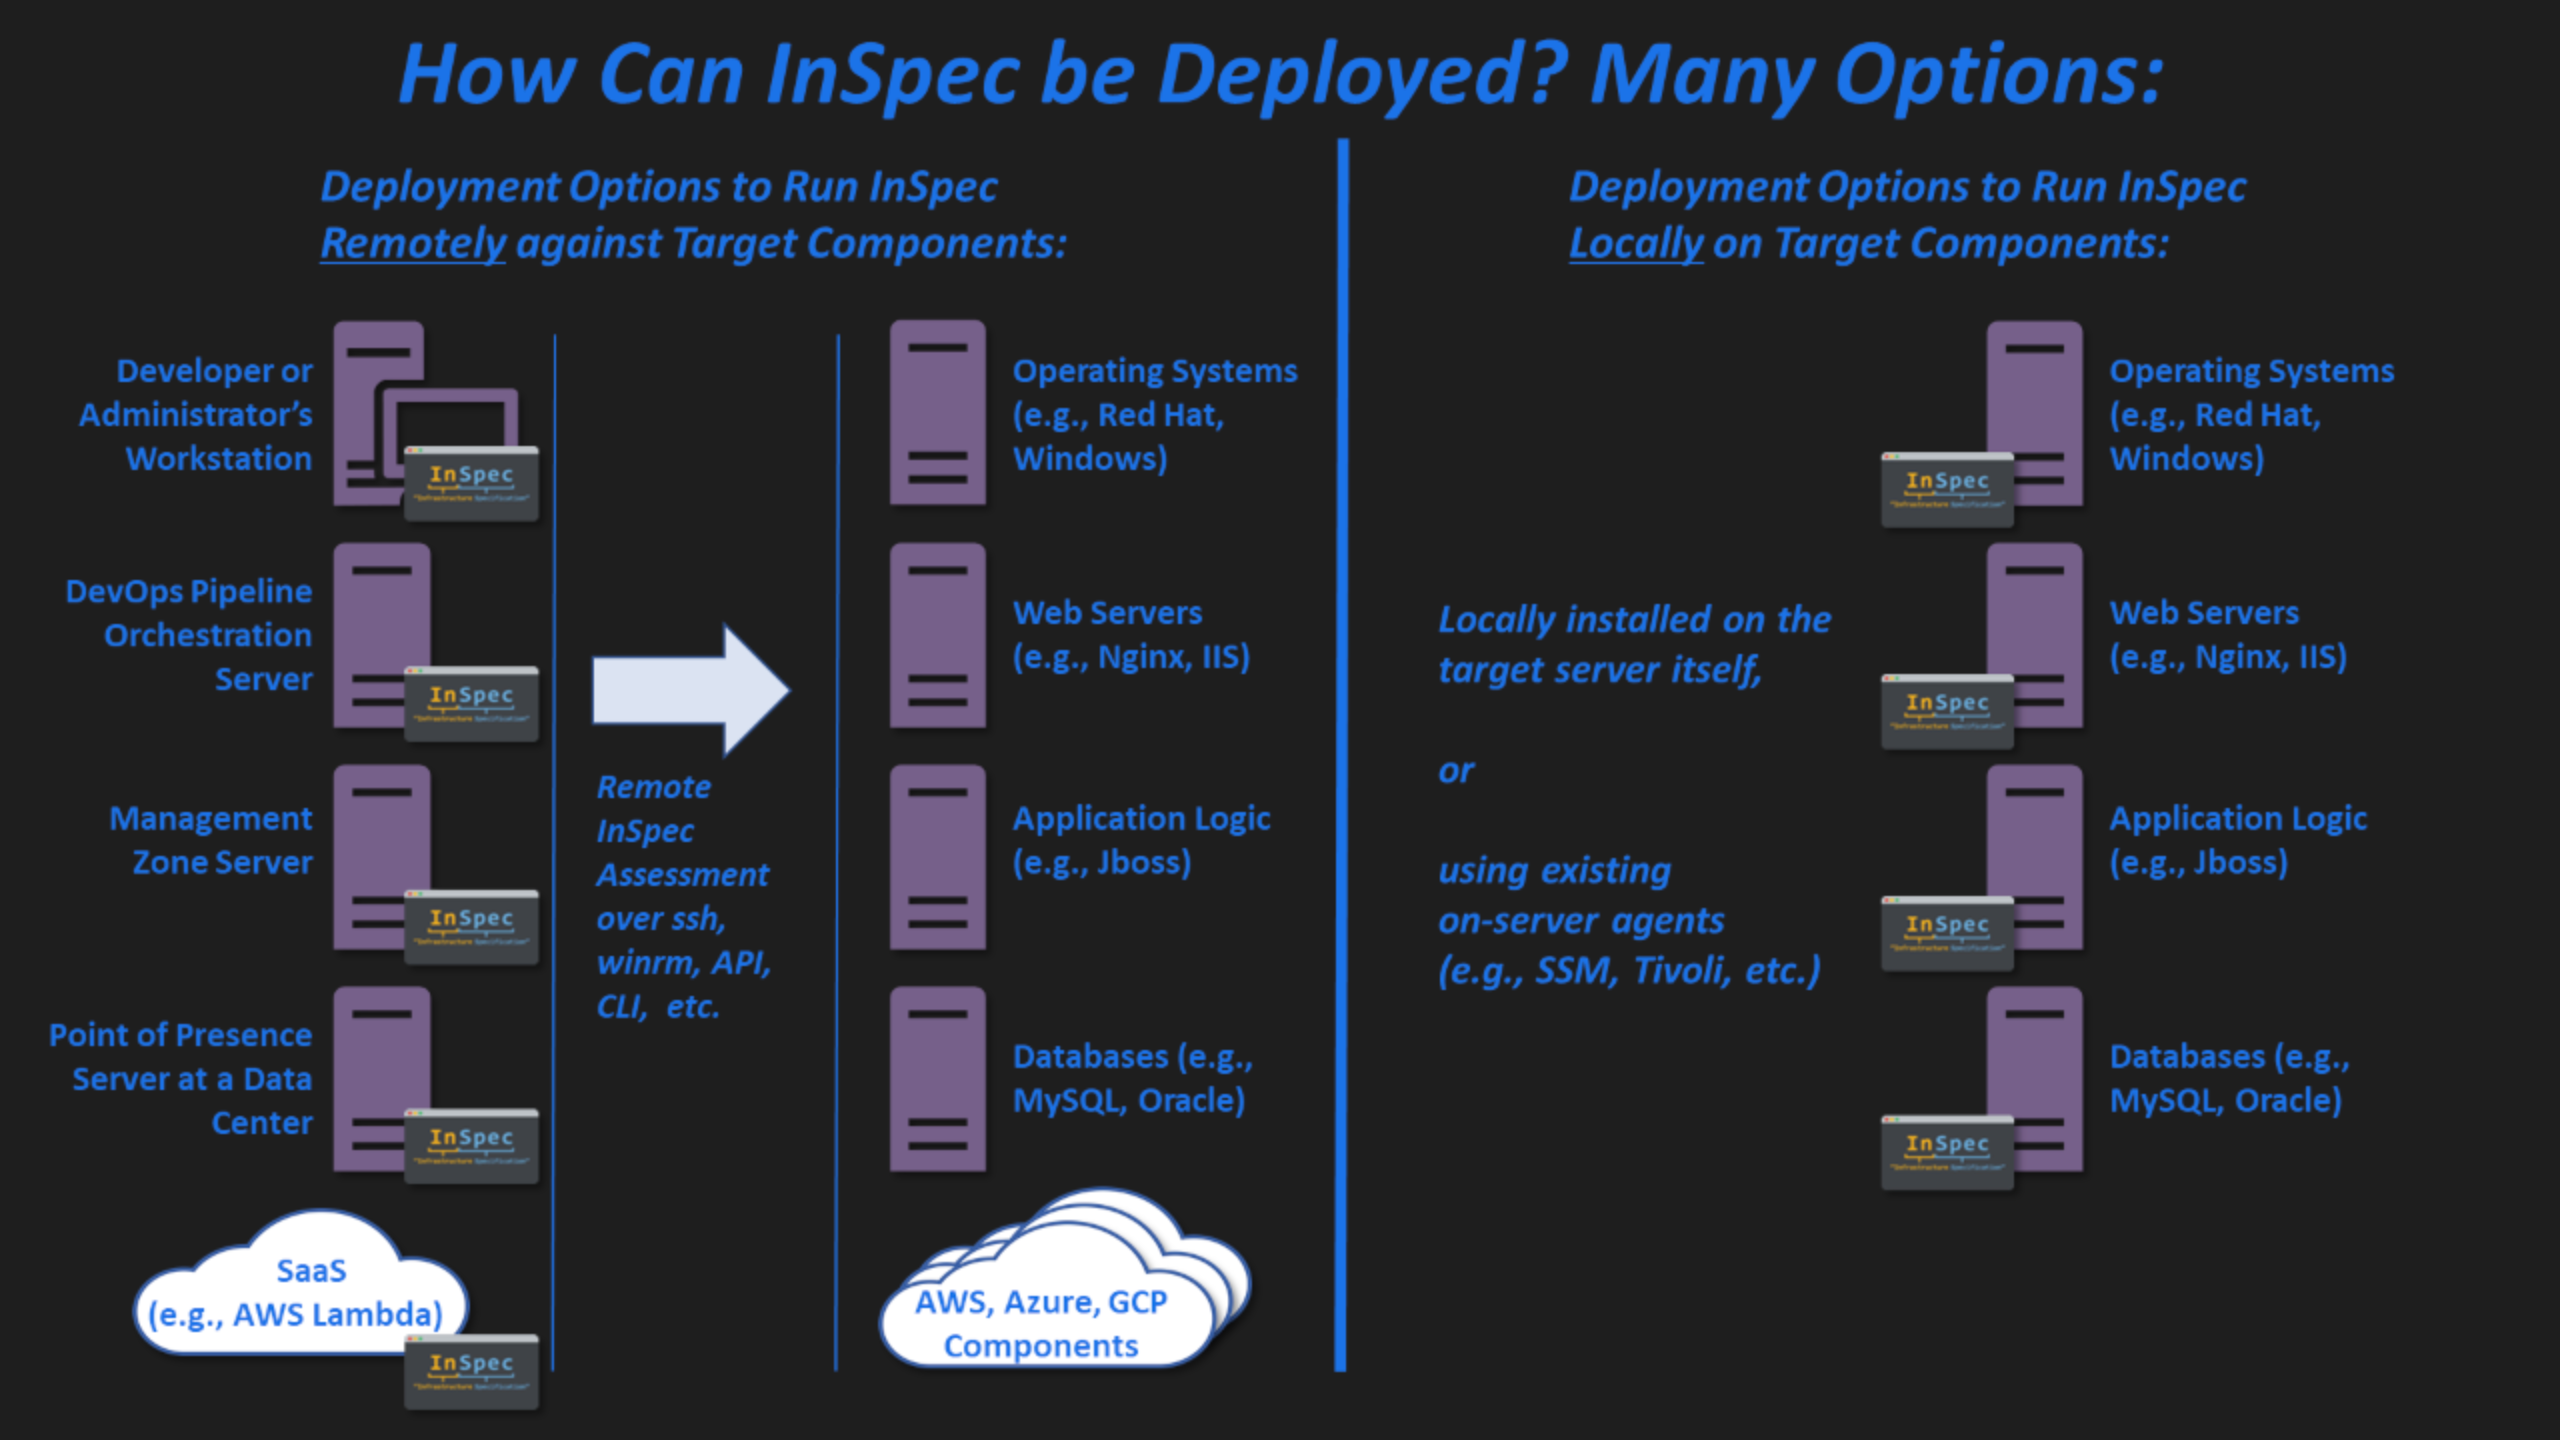
It is intended and recommended that InSpec be installed on a "runner" host (such as a DevOps orchestration server, an administrative management system, or a developer's workstation/laptop) and run against the target remotely. However, InSpec may be deployed in various ways depending on the needs of the user:
