System Statuses and Severities with Overrides
The System button is available in the Boundary View and Vulnerability View. From this view you will be able to update the status and severities of each system in your boundary. Additionally, you have the ability to apply overrides for each of these updates. Override rules can be set on findings so that the status you assign to a finding will persist on the selected systems when new test data is imported in the future. This override feature should be used almost exclusively to set statuses of Not Applicable for checks that are deemed Not Applicable to your boundary. Using this feature to get an override status of NotAFinding could cause you to miss a potential open finding in the future if security settings or Group Policy Objects (GPOs) are disabled or removed.
Updating Statuses with Overrides
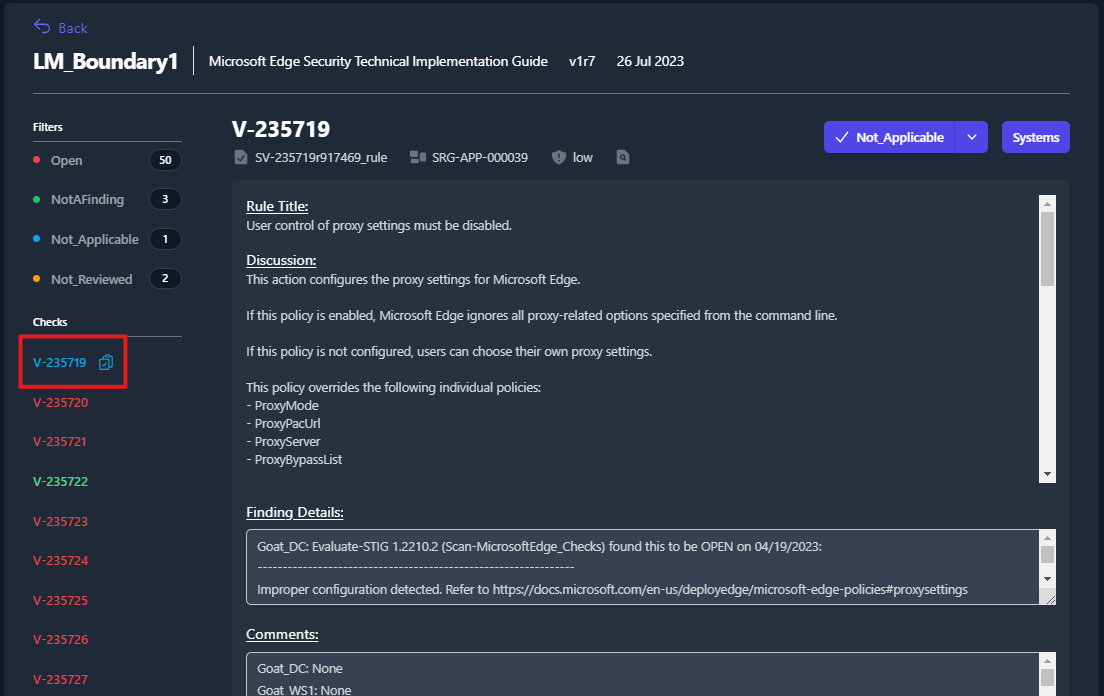
To view the status of each of your systems, you will need to click the Systems button (highlighted in Figure 52). A pop-up window will appear that displays all of the systems where this finding applies and the current status for each system.
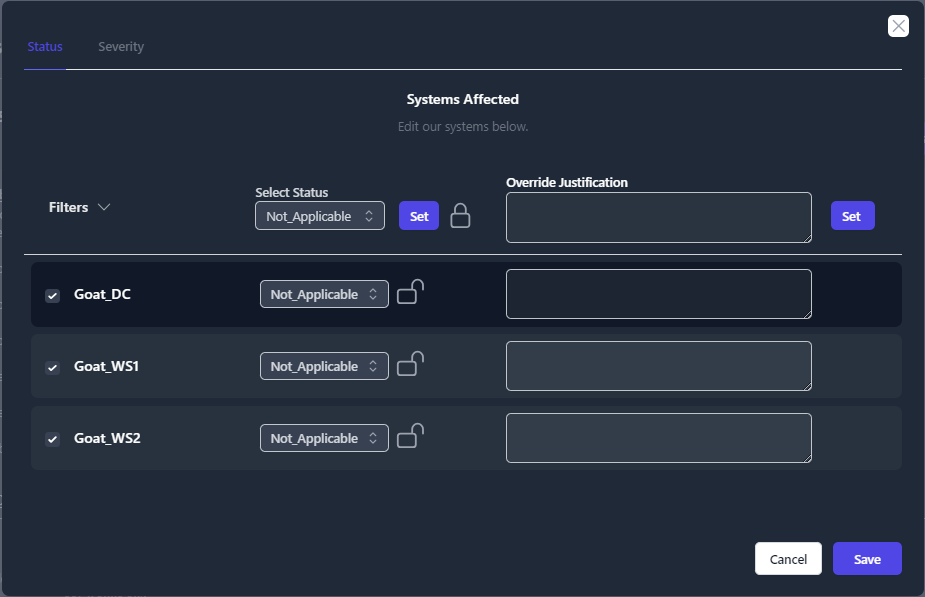
To make an update to a system; select the checkbox next to that system, change the status field using the drop-down menu, then click Save.
If you want to change the status of multiple systems at once, select the checkbox next to each system that you are changing. The Filters drop-down in the upper left will allow you to select multiple systems with the single click of a button. Once the desired systems are checked, select the new status from the Select Status drop-down (at the top of the middle column) and click the Set button directly next to that drop-down menu.
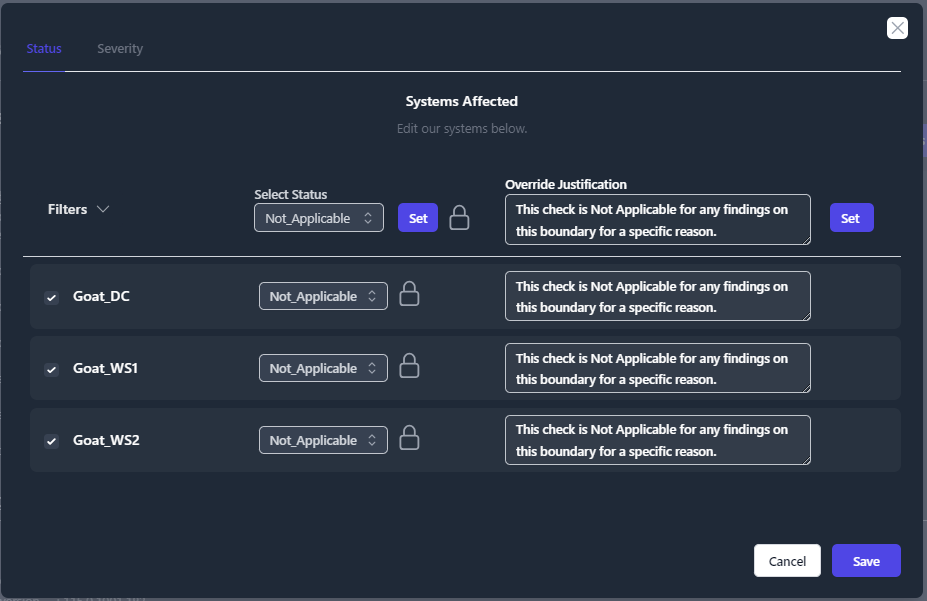
The lock button next to each status is for Overrides. To apply an override, check the boxes for each system that you wish to override. Select the status that you wish to set from the drop-down menu. Then, click the Lock button directly next to that drop-down menu for each check that you are overriding. Once the Lock button is set to the locked state, this status will be overriden each time new scan results are imported. Lastly, provide an Override Justification in the text box to the right of the stautses.
Once all of your changes have been made, click the Save button in the bottom-right corner of the pop-up window.
Once an override has been applied, an icon will be displayed next to the check that signifies that there is a override. See Figure 61 for an example of the override icon.
Updating Severities with Overrides
Updating severities works identically like the status updates. To update the severity of a finding, click the Systems button, then click the Severity tab on the pop-up menu. Select the checkboxes next to each system the you are changing, then update the severity in the drop-down menu for each system. If you want to apply the same severity change to multiple systems, you can check the boxes for the systems you are updating and set the status in the Select Severity (at the top of the table) and click Set. This will apply the severity to each system that is checked.
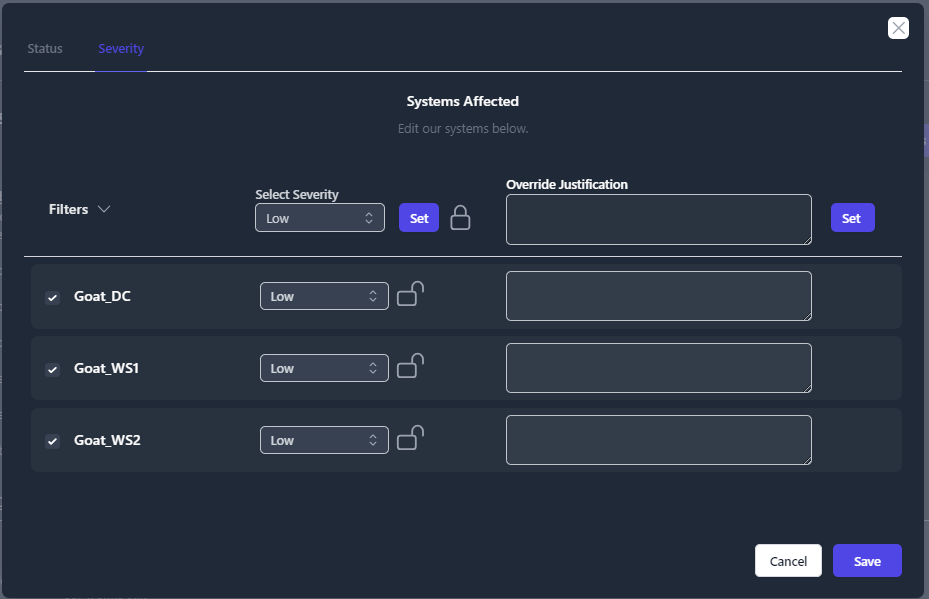
To apply a severity override, select the severity that you wish to set from the drop-down menu. Then, click the Lock button directly next to that drop-down menu for each check that you are overriding. Once the Lock button is set to the locked state, this severity will be overriden each time new scan results are imported. Lastly, provide an Override Justification in the text box to the right of the stautses.
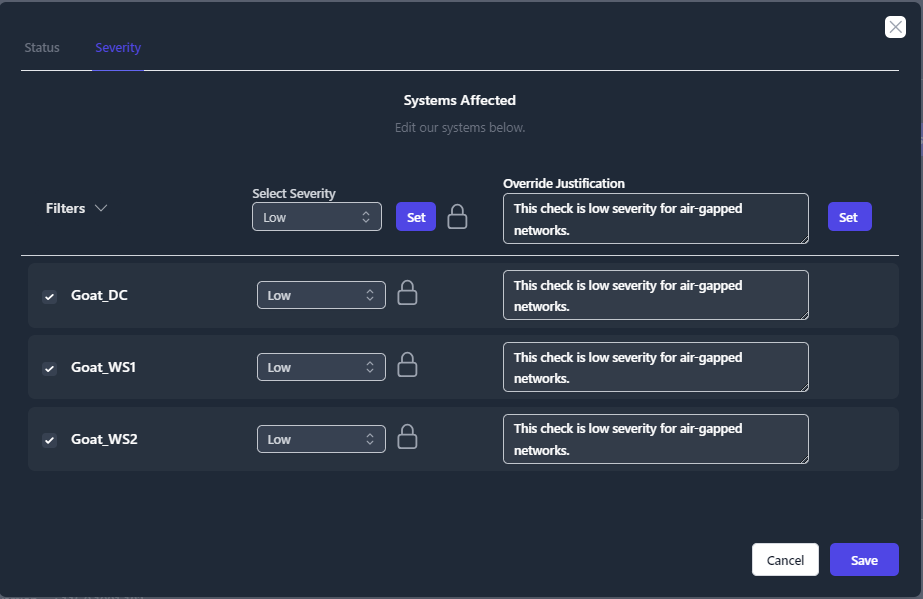
Once all of your changes have been made, click the Save button in the bottom-right corner of the pop-up window.